Beginner Tutorial for QSpice
This post provides examples to help beginners pick up QSpice as quickly as possible. Remember, QSpice works best with keyboard shortcuts during the schematic drawing stage. At first, it may seem unfamiliar, but with a few days of practice, you will be able to build circuits and set up simulations very quickly!
1. Create a Schematic
Here, you need shortcut key V (voltage source), R (resistor), Q (transistor), W (wire), N (net label), . or T (text / directive)
01-CreateSchematic(.op).qsch (4.3 KB)
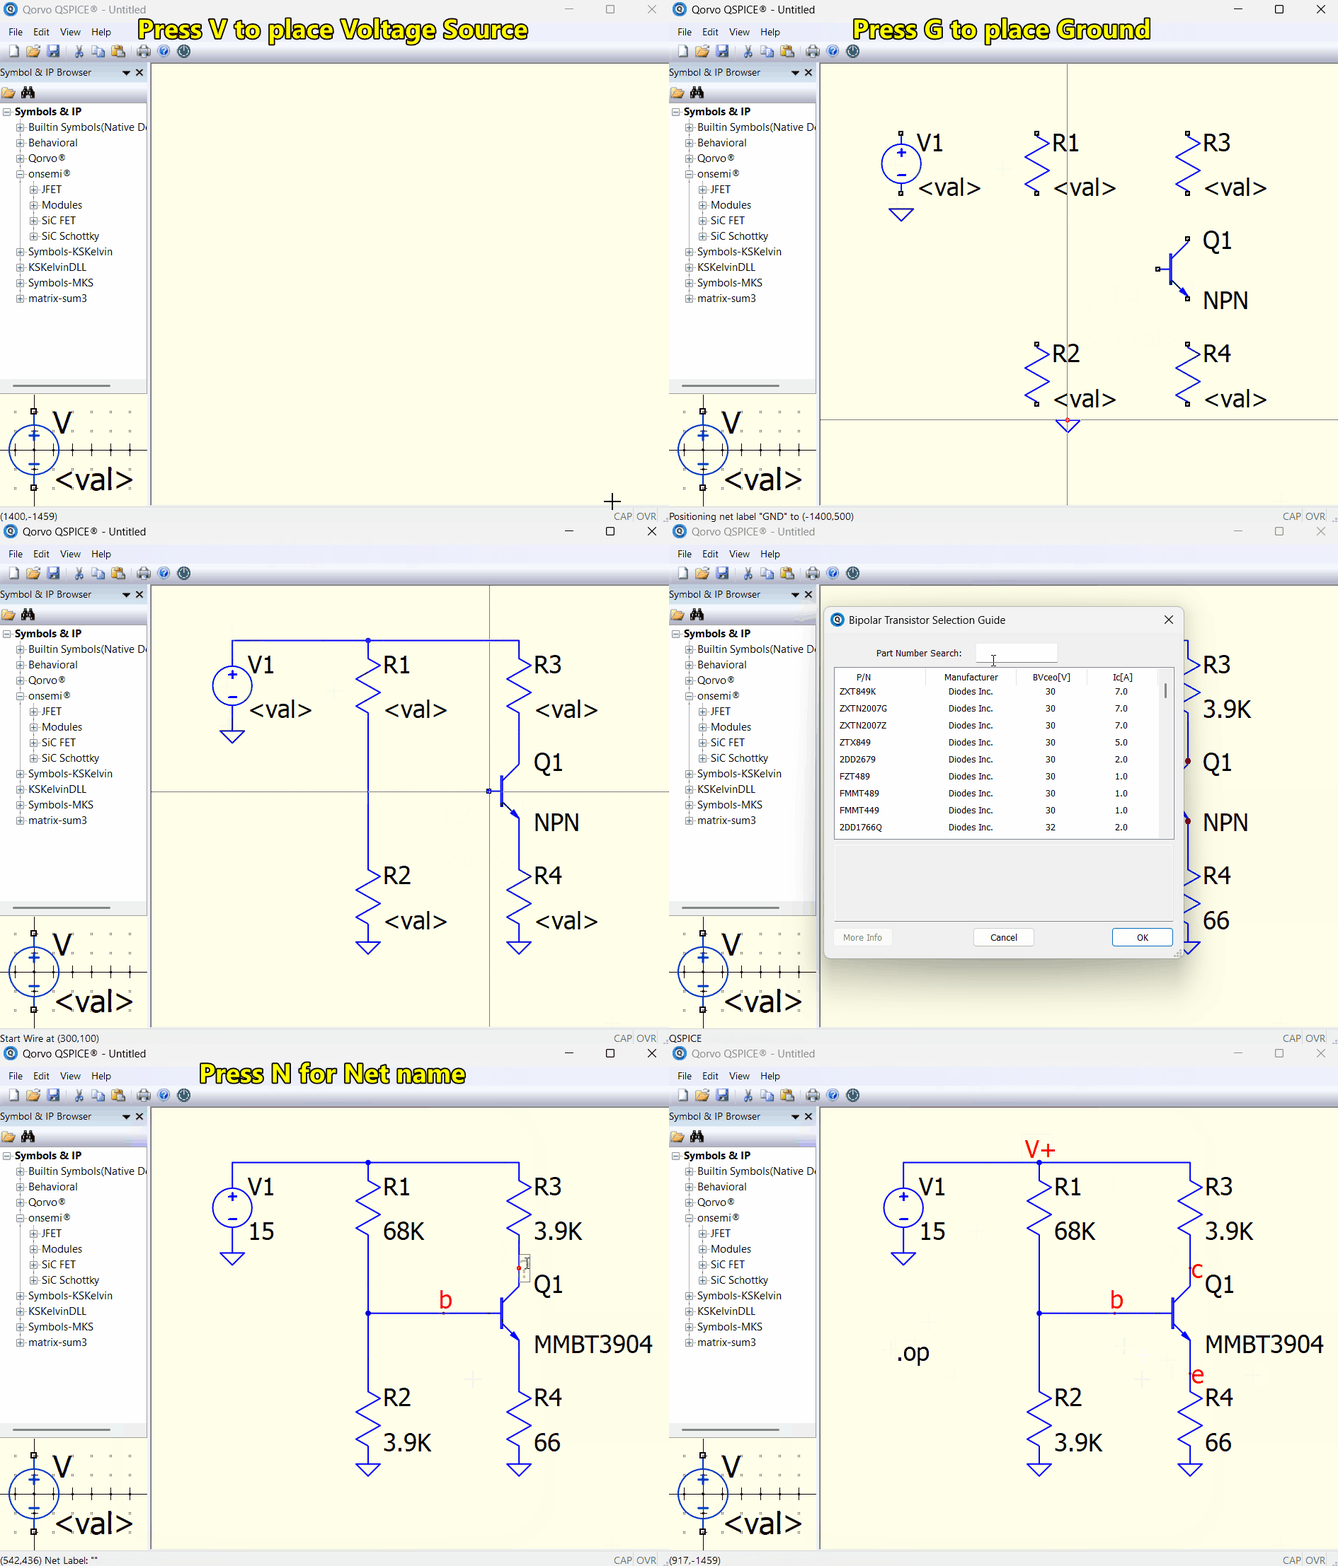
2. Run a dc simulation (.op)
Run simulation and add trace to waveform viewer
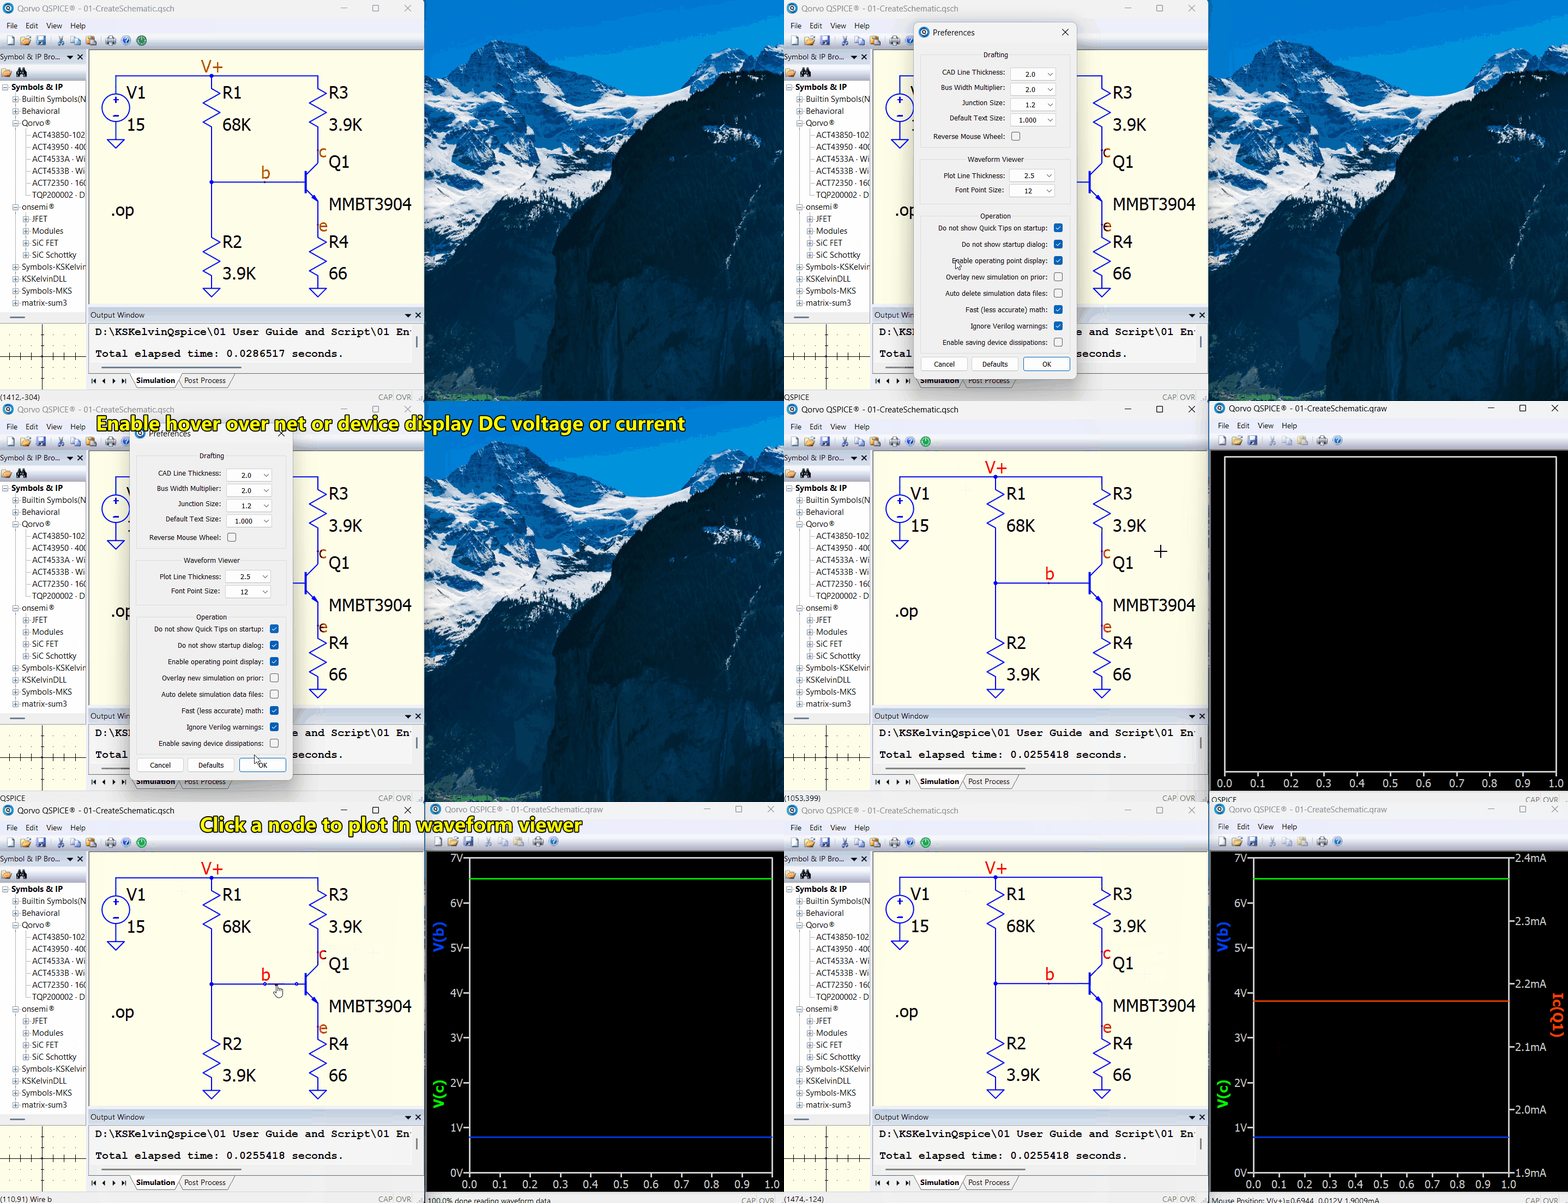
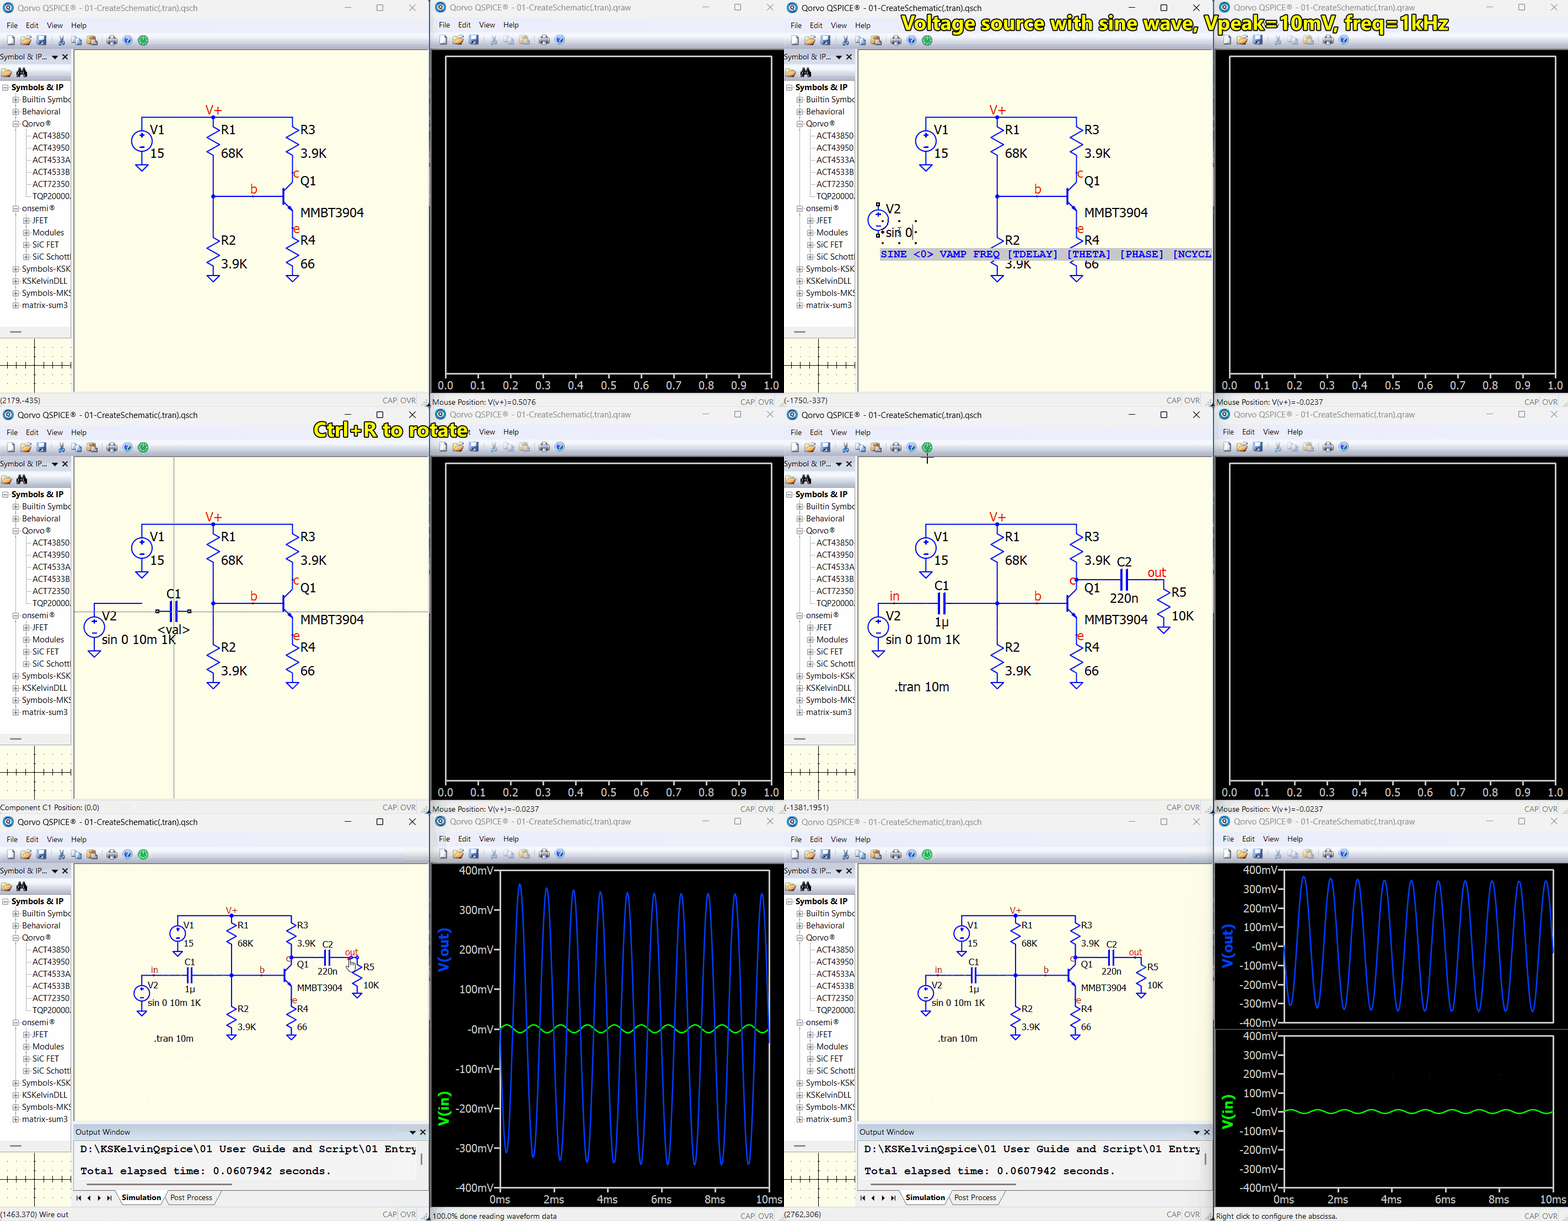
3. Run a transient simulation (.tran)
Set up a sine wave and a .tran directive. Add a window in the waveform viewer to create multiple plot panes.
03-CreateSchematic(.tran).qsch (7.0 KB)
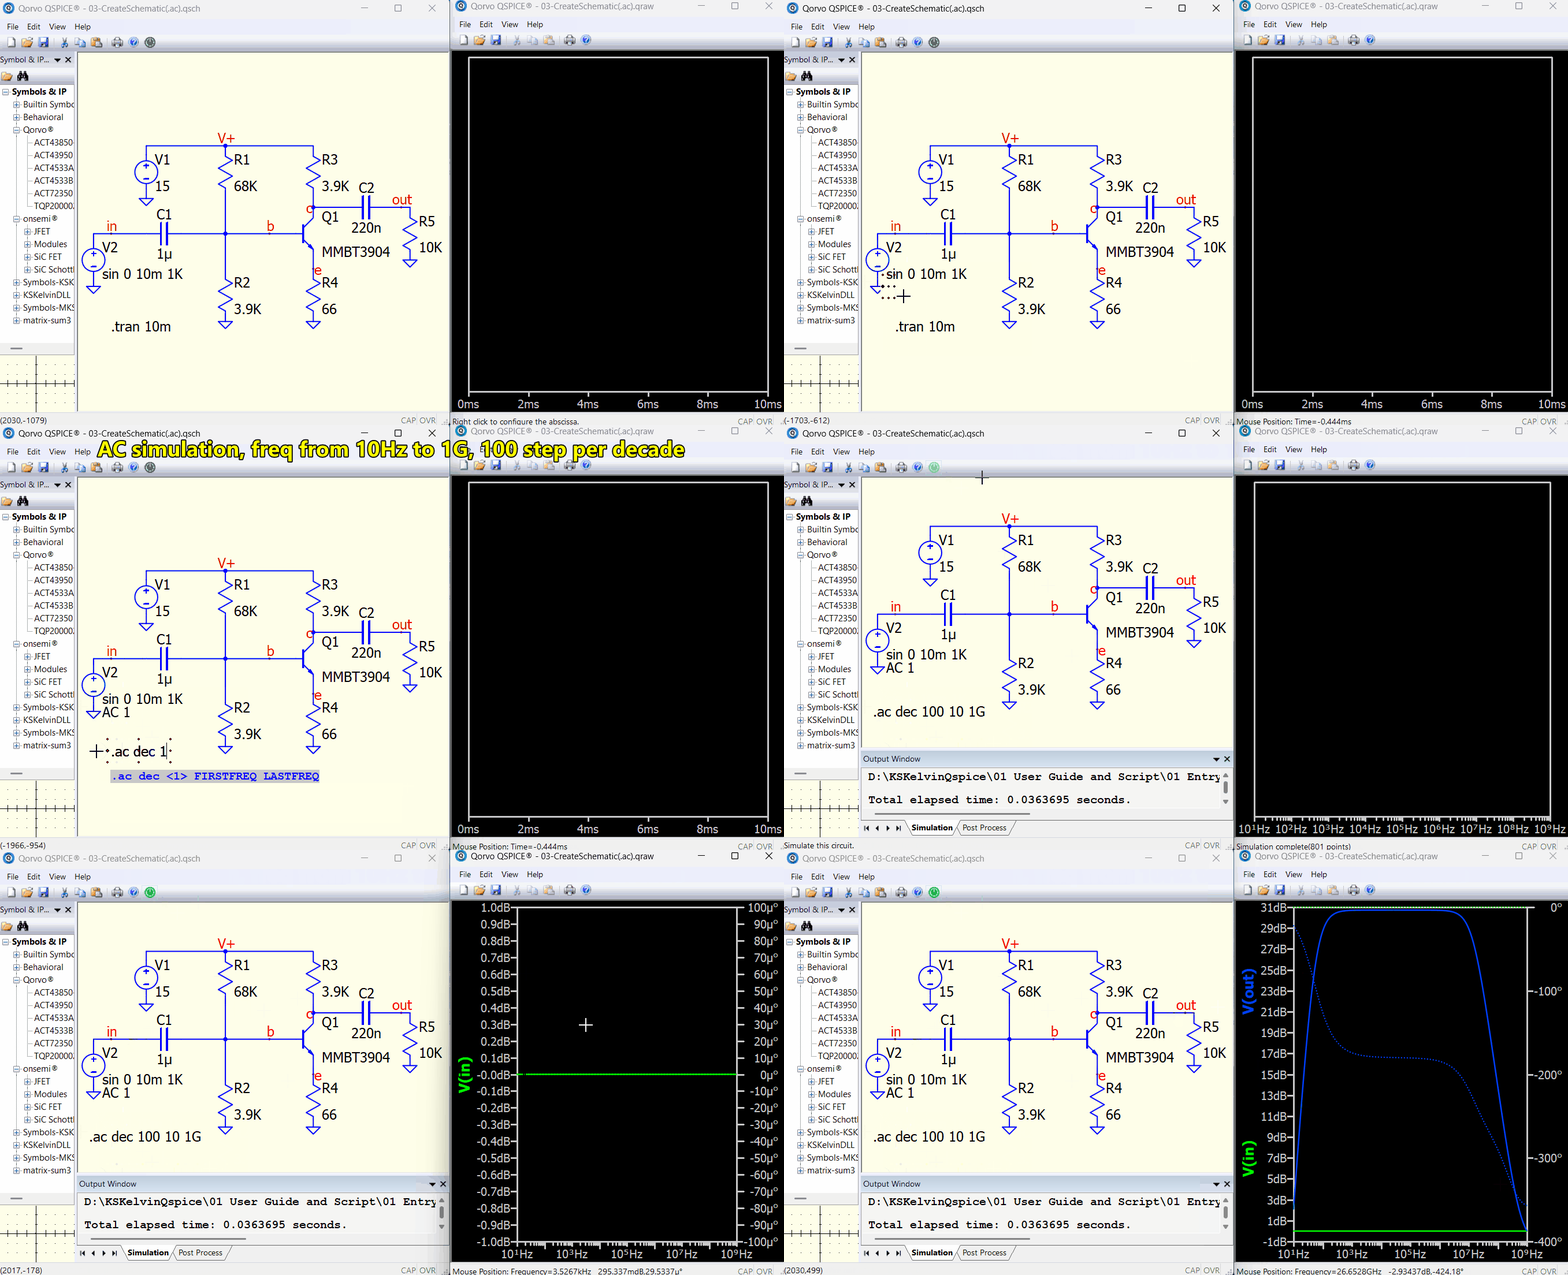
4. Run an AC simulation (.ac)
Add an instance parameter to configure an AC source (AC 1) and plot the bode plot
04-CreateSchematic(.ac).qsch (7.1 KB)
2 Likes
More Detailed Beginner Guide
If you need a more detailed entry guide, you can download the one I wrote here :
https://github.com/KSKelvin-Github/Qspice/blob/main/Guideline/Qspice%20-%20Entry%20User%20Guide%20by%20KSKelvin.pdf
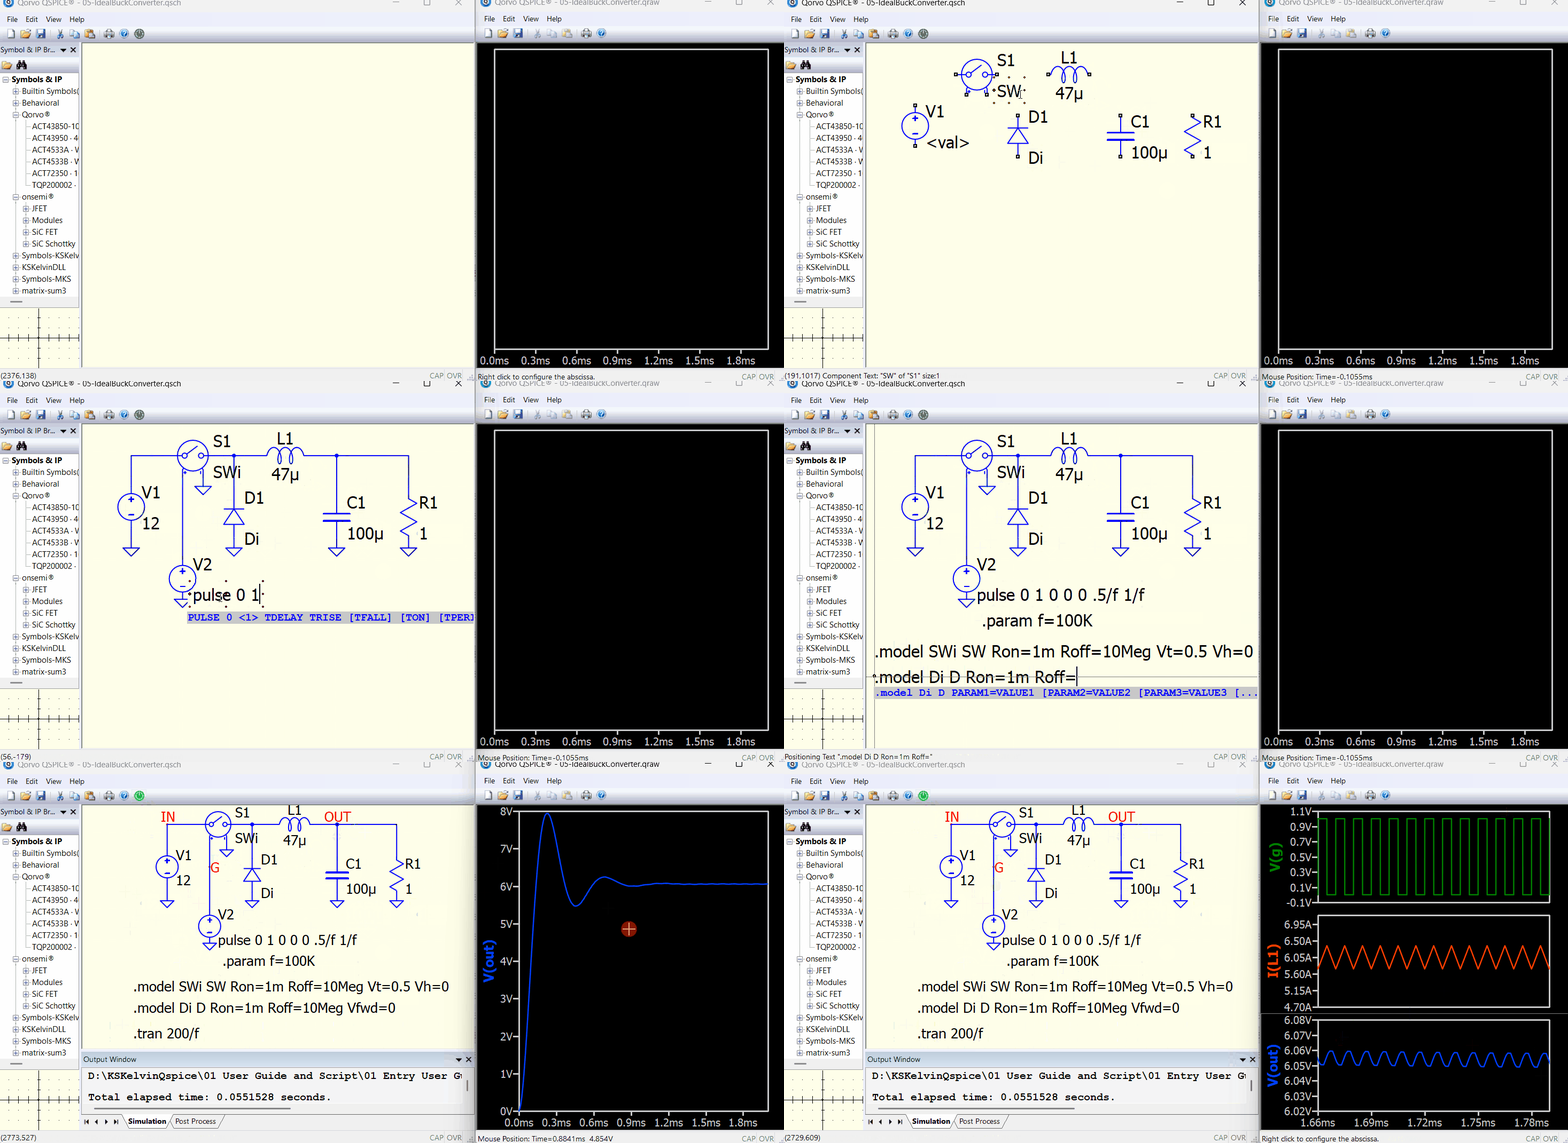
5. An Ideal Buck Converter with Qspice native devices
From a blank schematic to an ideal buck converter using only native QSpice devices. New shortcuts include S (switch), L (inductor), and D (diode). This also demonstrates the use of a .param (parameter) directive for f as the switching frequency.
05-IdealBuckConverter.qsch (5.8 KB)
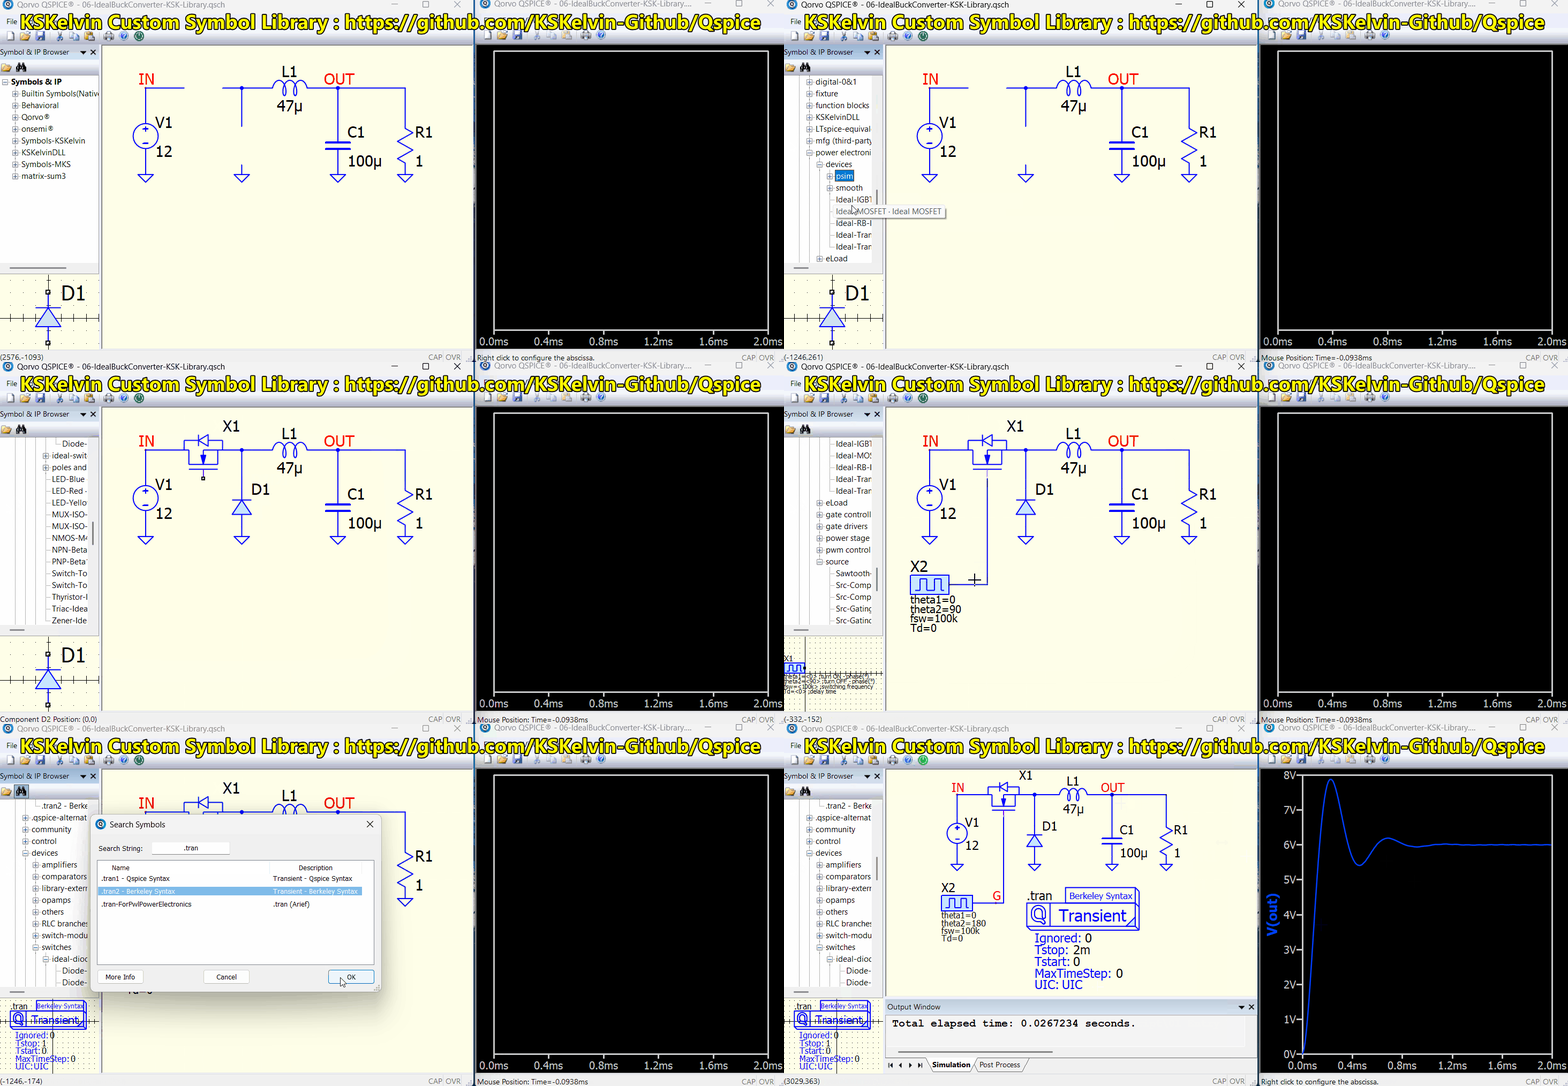
5. An Ideal Buck Converter with KSKelvin Custom Symbol Library
Finally, I have built a library with a huge number of custom symbols that can ease your simulations. This library includes various analog and digital devices. Here, I have included an Ideal-MOSFET, Ideal-Diode, Gating-Block, and a .tran symbol as a demonstration for the buck converter example
This library can be downloaded from : https://github.com/KSKelvin-Github/Qspice/
06-IdealBuckConverter-KSK-Library.qsch (9.5 KB)
3 Likes
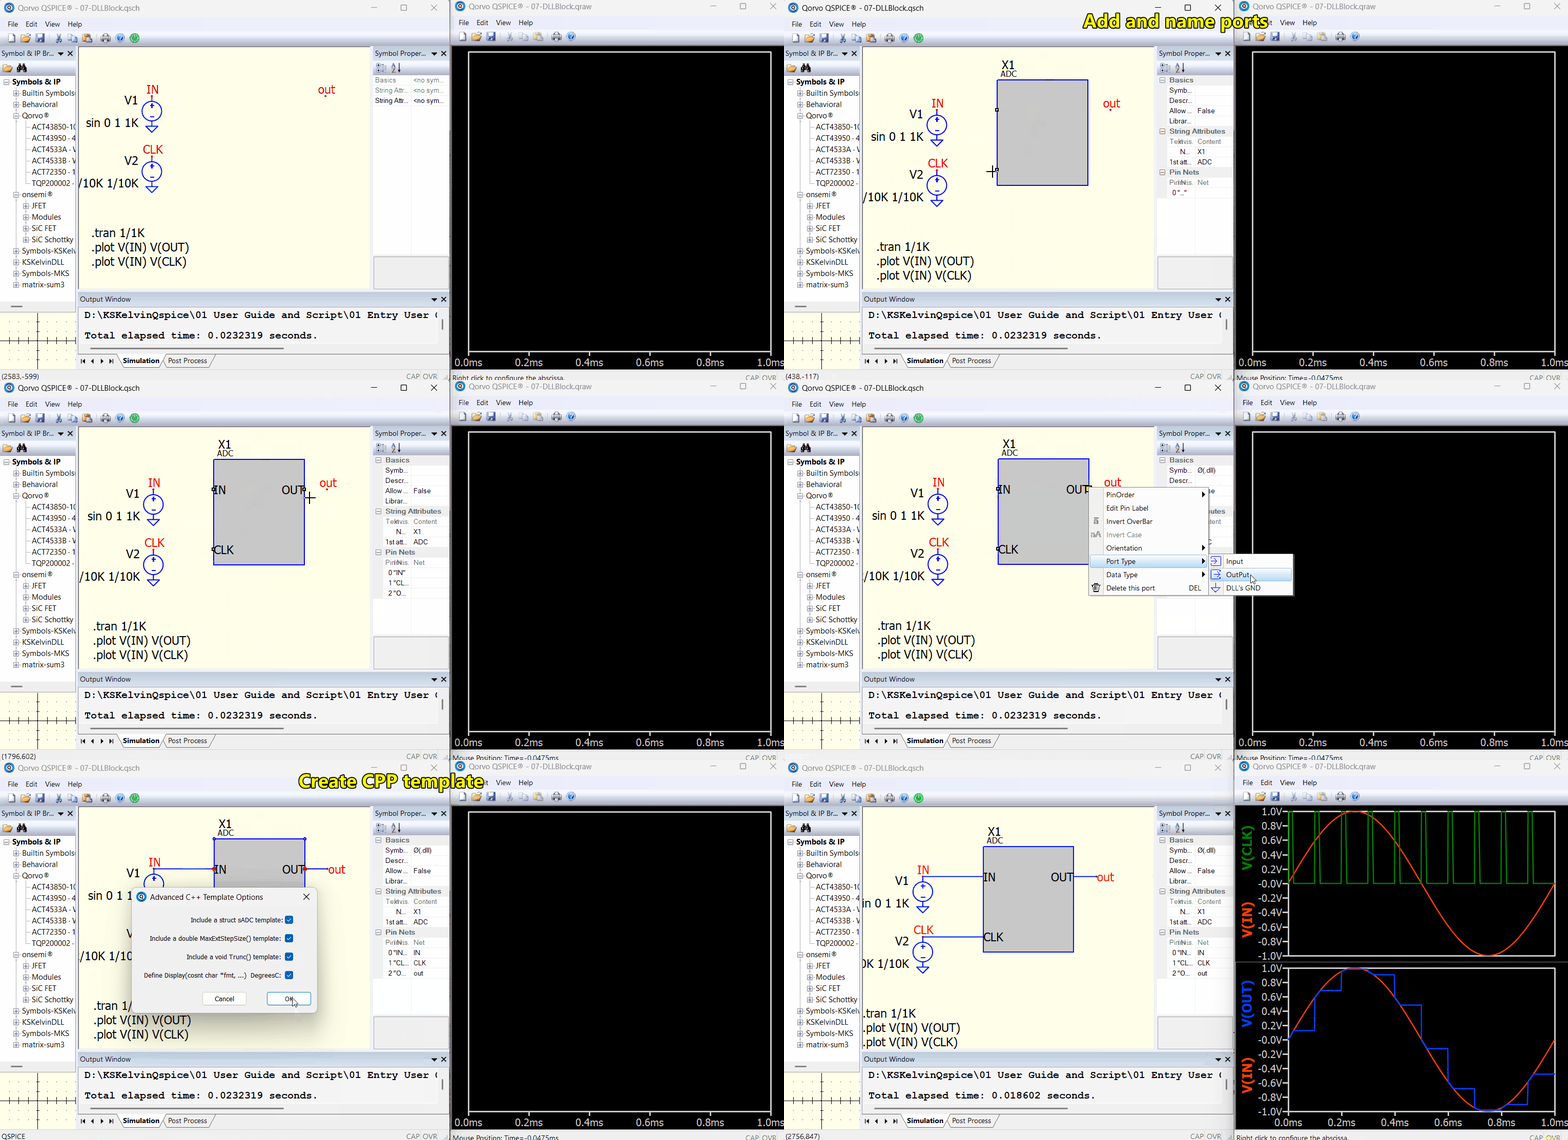
6. DLL Block (C++ Block), Ø-Device
One of the most important features of QSpice is the Ø-Device (DLL block or C++ block). You can implement sophisticated control algorithms with it. Here is the basic workflow for creating a Ø-Device. This example is an ADC with an external, level-triggered clock.
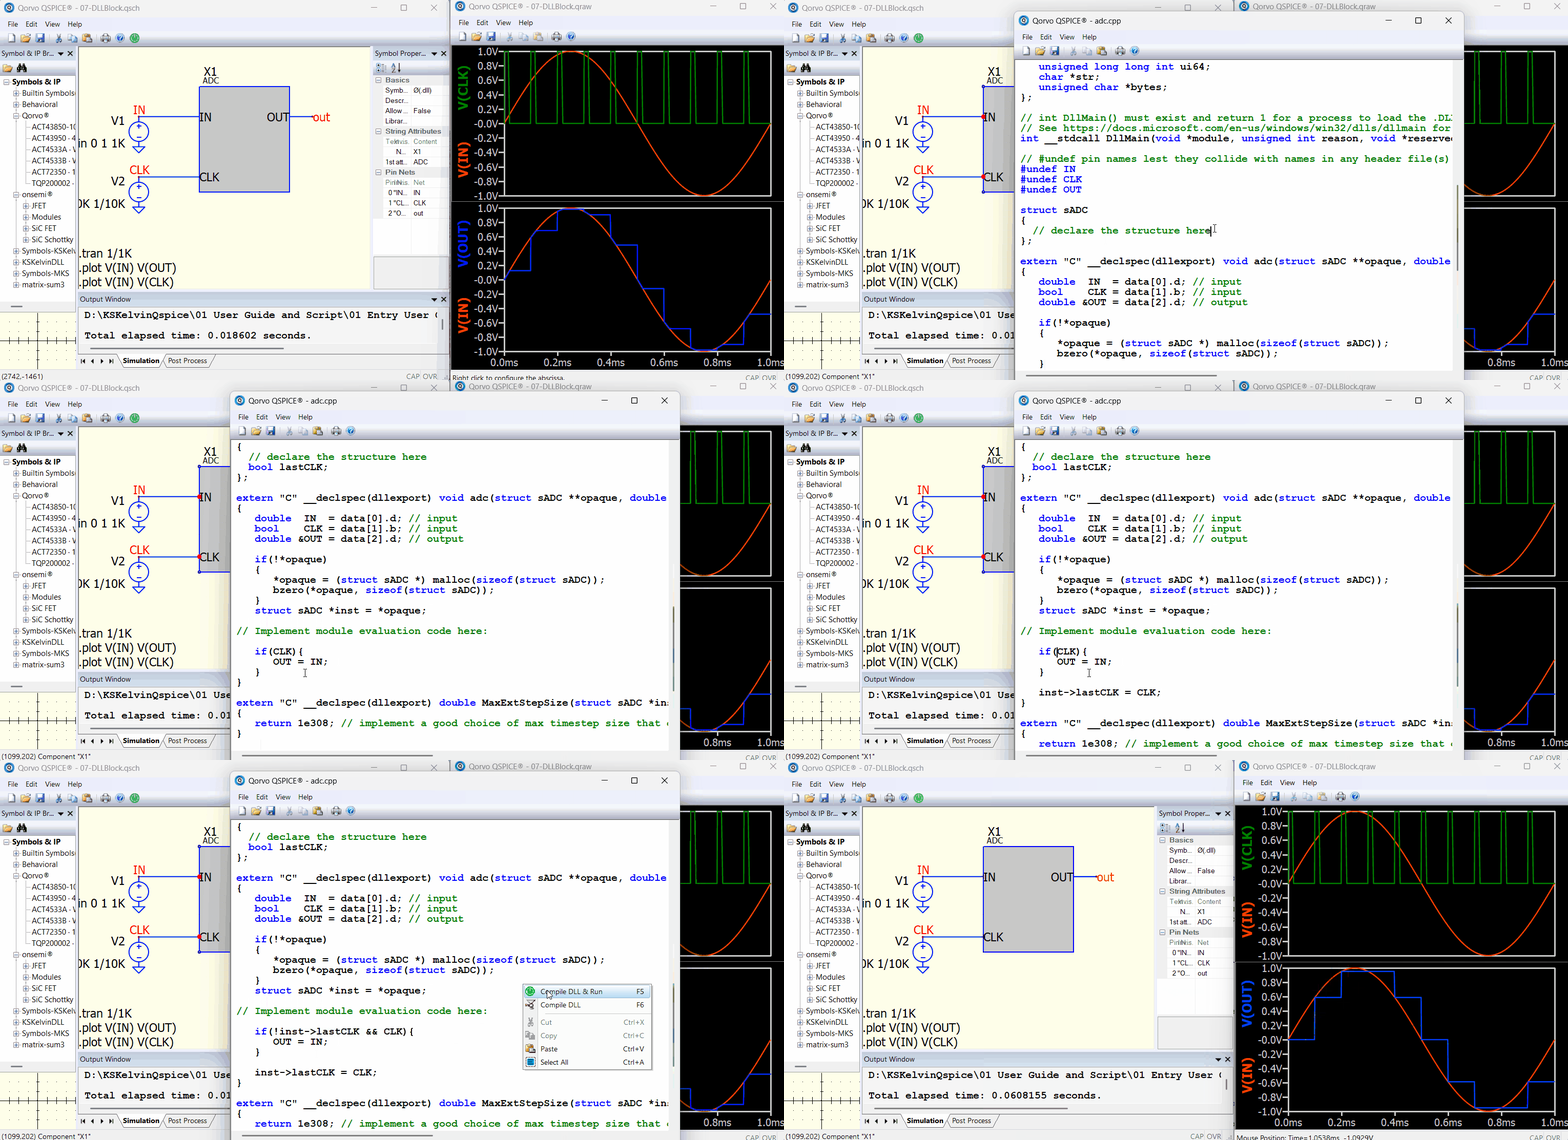
However, in general, ADC triggering occurs at the rising edge of the clock. This is done by using an instance variable to store the previous clock state so that the update is only triggered on the clock edge.
07-DLLBlock.qsch (2.2 KB)
adc.cpp (4.2 KB)
If you need more information about the DLL block, go to my GitHub and download the Device Guideline. There is a section explaining the Ø-Device; to master it, you must also learn concepts such as the trunc() function in the DLL template for the use of TTOL, etc.
@RDunn and I worked on a complete tutorial for implementing a digital PID controller. If you plan to work with DLL blocks, I highly recommend studying this project, as we not only upload the code but also a pdf explanation document.
C++ PID Controller for Qspice (Community Project) - QSPICE - Qorvo Tech Forum
4 Likes
This is awesome, thanks so much for creating it.
2 Likes