Part 3: Import model into Qspice and build schematic
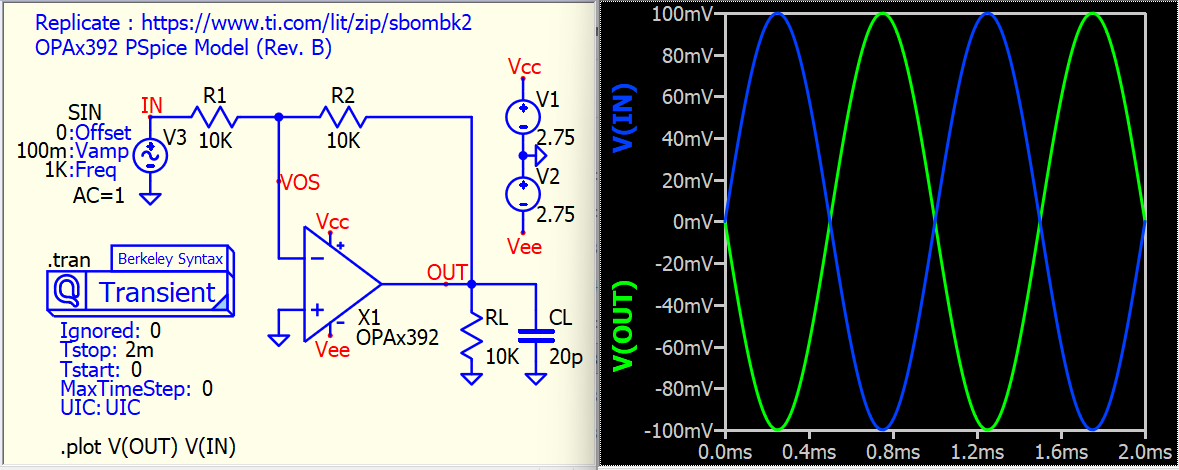
Now, you can follow the demo circuit to build your Qspice schematic.
To import model:
- Use a text editor to open the model library (.subckt) file.
- Ctrl-A to select all the text, then Ctrl-C to copy all the text.
- Go to the Qspice schematic and press Ctrl-V to paste all the text.
- A tool for autogenerating symbols will pop up.
- Click Include Entire File > YES. (!!! very important)
You now have your symbol with an embedded subcircuit netlist.
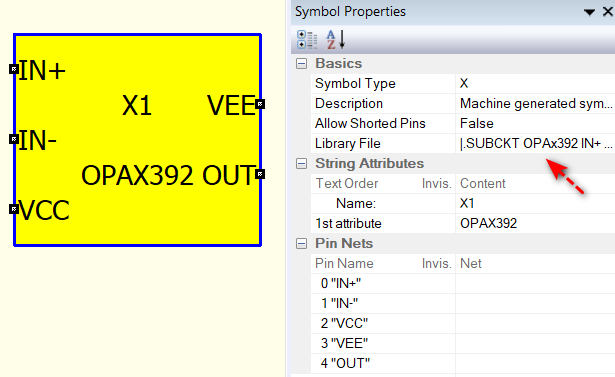
So, what is an embedded subcircuit netlist? If you right-click on this autogenerated symbol (in yellow) > Show Symbol Properties, and look into the Library section, you can see a one-line subcircuit netlist there. This means you don’t have to carry the .lib file with your schematic. This is very smart, isn’t it?
Now, you can rearrange the pin locations in that yellow block and build a circuit according to the demo circuit.
Part 4: Setup simulation directive
Make sure you build a circuit according to the demo schematic. After that, you need to set up the simulation directive. Go back to PSpice, open the simulation profile, and take a look at how the simulation directive is set up (e.g. simulation time, maxstep etc…). Set up the same thing in Qspice.

Up to this point, you can run your schematic to see if it works.
Part 5 : Troubleshooting
If you encounter a “timestep too small” issue, try adding the following options, perhaps one by one:
.option fastmath=0
.option trtol=7 method=gear
.option cshunt=1p
If nothing helps, it’s time to create a post in the forum. Try to upgrade yourself to a basic member so that you can upload the .qsch file. Avoid relying solely on a screen capture. Remember to save time for those who are offering help. In most cases I review, the issue is NOT with Qspice.
Here is how to increase forum Trust Levels
https://forum.qorvo.com/t/mosfet-transistor-simulation/22388/6